Step 1 / 11

there are 2 main reasons why we need to do air layering of this tree:
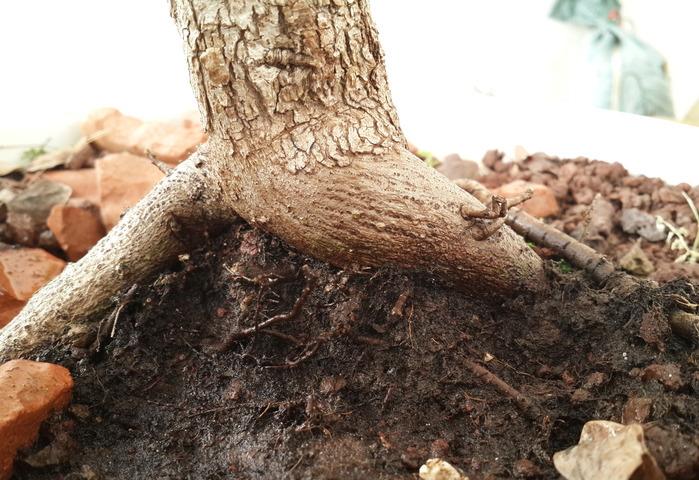
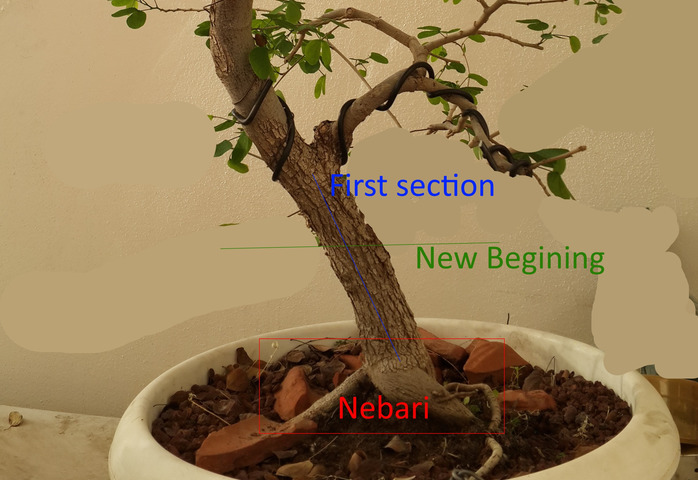
1. the current nebari ( marked in RED - which is the most important part in a bonsai tree ) is spread to only 2 directions and looking just Bad
2. the first section ( marked in a blue line ) is very long, and this is usually true for young trees, and we are trying to create a tree that looks old
Doing Air layering is a process that puts the tree under BIG stress, it should only be carried on healty and strong trees, and in the current season
Step 2 / 11
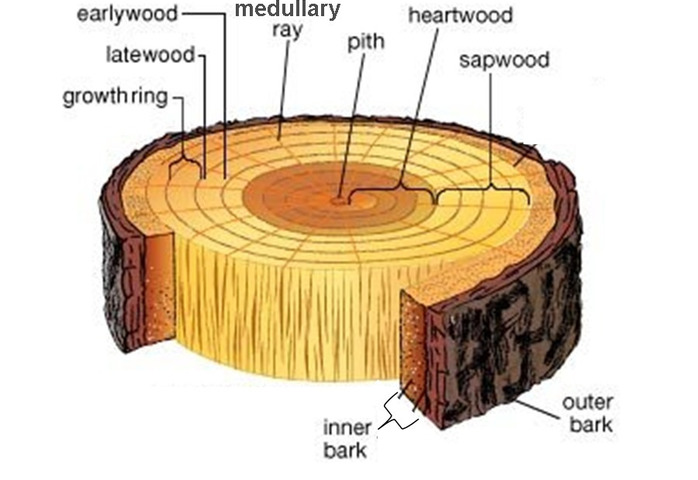
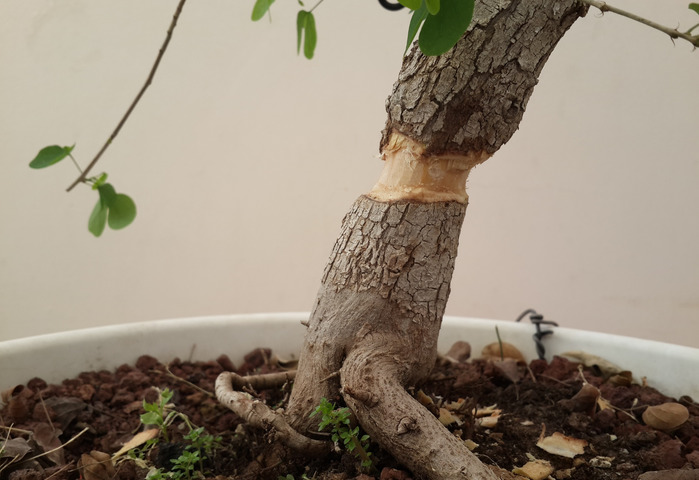
in order to make the tree produce new roots, we need to interrupt the flow of energy from the leaves down, this is why we cut the bark ( outer + inner )
But !!! we still want the upper part to receive water and nutrients from the existing roots ( the process may take some time ) - so we need to be very careful not to hurt the Sapwood, which is the layer that carries them up
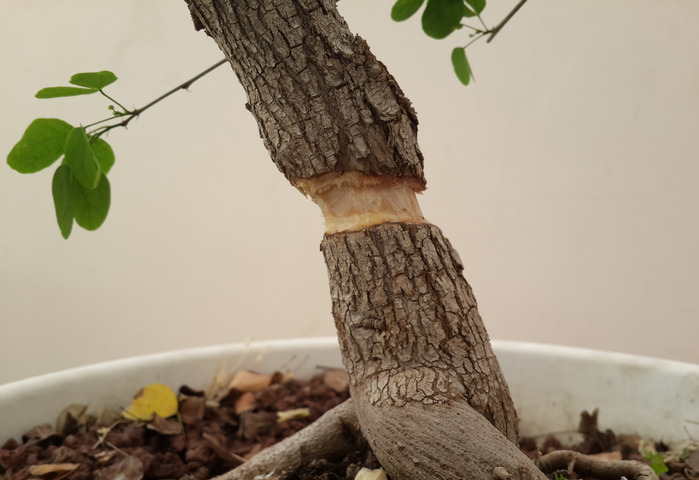
so...using a sharp knife, we remove a strip of the bark, in the location we want the new roots to emerge ( they will emerge from the top of the strip )
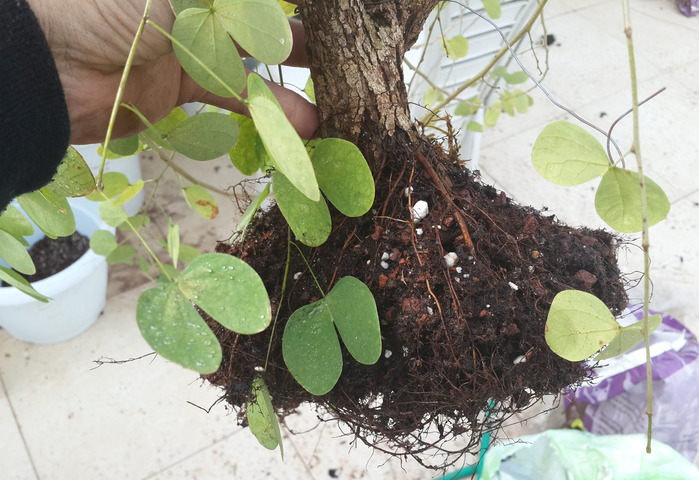
Step 3 / 11
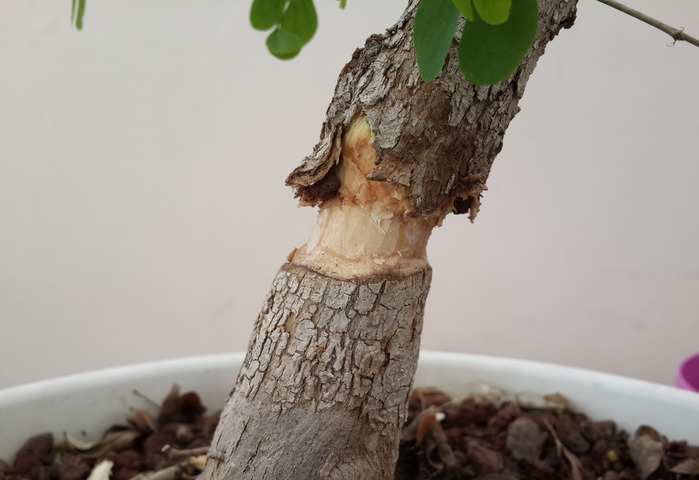
This is an OPTIONAL step
in some cases we want to create a better spreading, and also to create a nebari that looks less artificial and more natural / Wild
We can do this by inserting small stones between the bark and the Sapwood as seen in the picture
Step 4 / 11
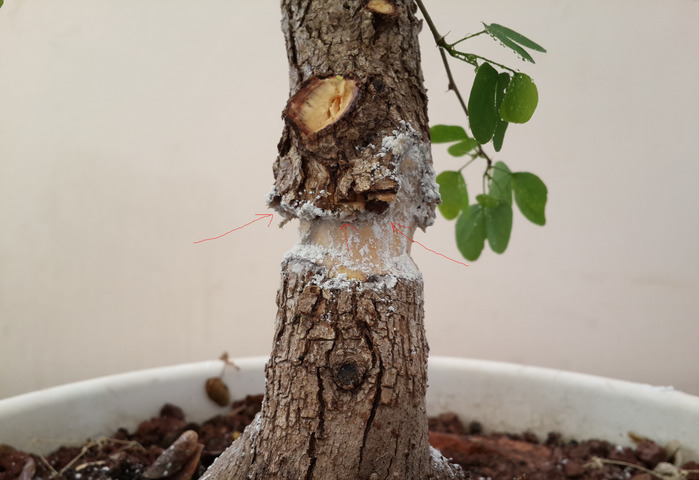
In this step we put some rooting powder / Gel to encourage the formation of the new roots
The more the tree specie is not likely to produce new roots, the more the need for using this is important
in order to be efficient, you need to use rooting no. 8 ( the weaker ones are not really helping )
Step 5 / 11
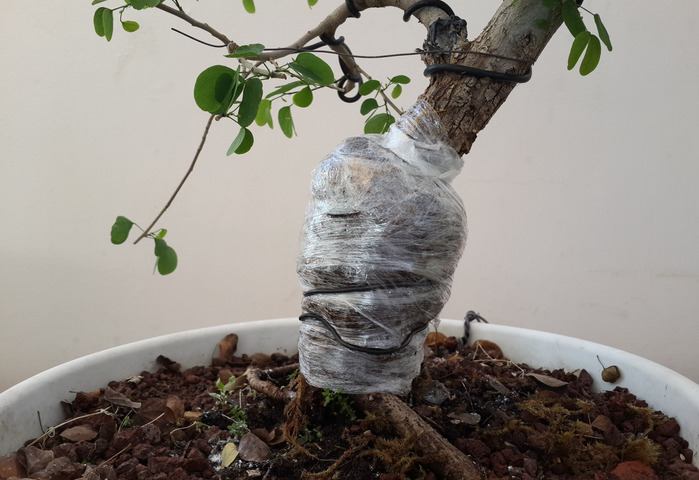
First you need to wrap the place with a material that will hold moisture - the best material is sphagnum moss
then you wrap it with a nylon to maintain high humidity
and use some wire to hold everything in place
Step 6 / 11
Now you wrap it with Aluminum foil - it is used to prevent the area from over-heating
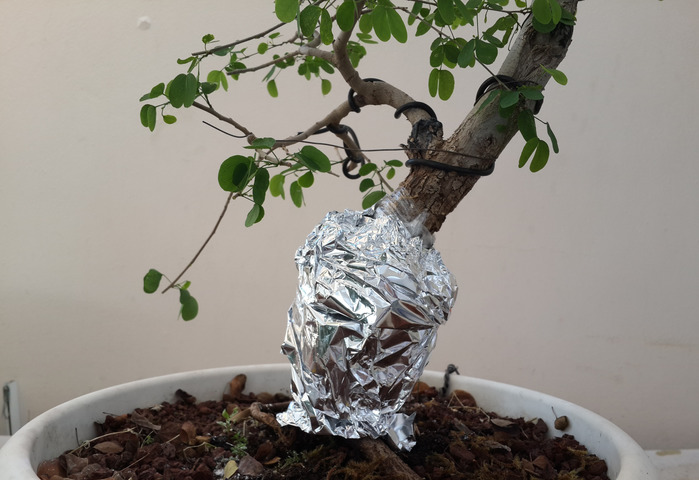
Step 7 / 11
From time to time, remove the aluminum foil, check the growth of the new roots and make sure the sphagnum moss is Moist, if it is not add water from above, or use a syringe
the time the process takes is varying according to : the tree specie, the season,...
in general it can take between 3 weeks to 5 months
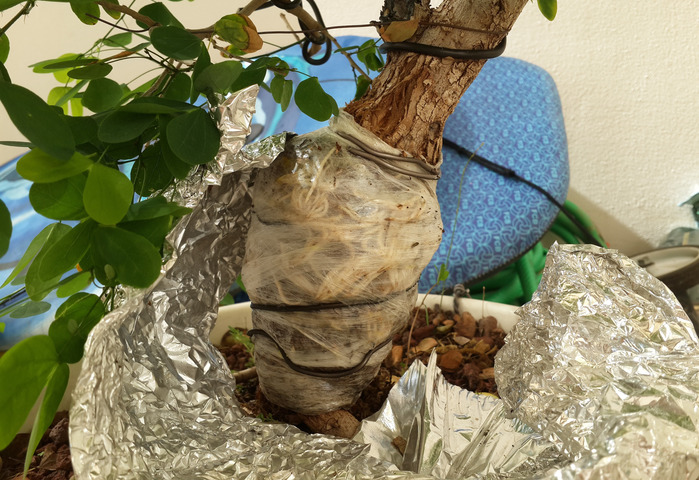
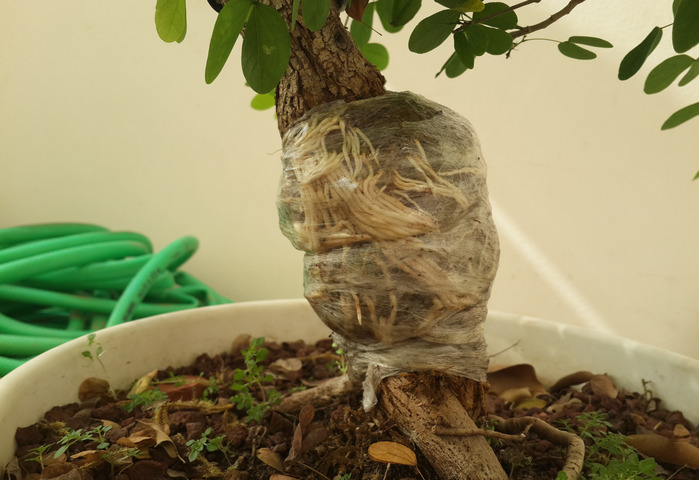
Step 8 / 11
When the quantity of the roots is sufficient, and it seems they do not have more space to grow it is time to remove the aluminum and the nylon and move to the next step
Step 9 / 11
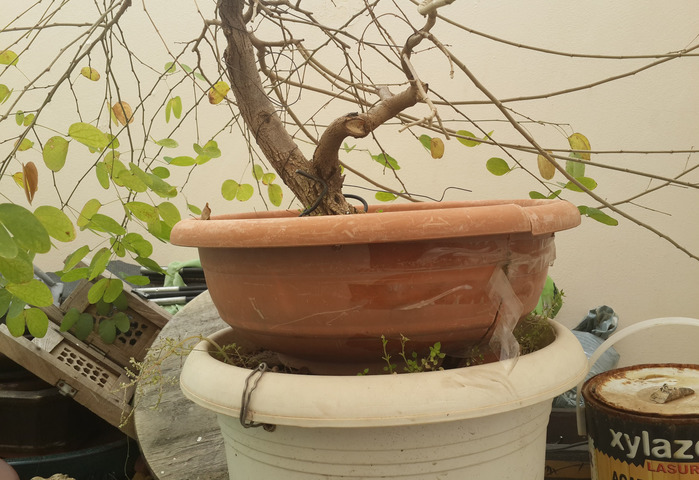
This is an OPTIONAL step !
that we do NOT separate the new part now...
Instead we take a training pot, we cut a hole in the bottom, and cut in the edge,
then we put the pot around the new roots and fill it with good soil
we then let the tree continuing developing the new roots, while the upper part continue to grow ( feeding from both the new root system and the old one )
there are 2 main advantages to using this :
1. the risk that the upper part will die due to insufficient quantity of roots is decreasing dramatically
2. if we cut, right a way the upper part growth will be very slow ( until the tree will develop the old amount of roots ) - so we loose time
you can let the roots grow like this for 1-2 months...
or wait a few months ( till the next growth season = usually the spring ) - this is the preferred option IMHO
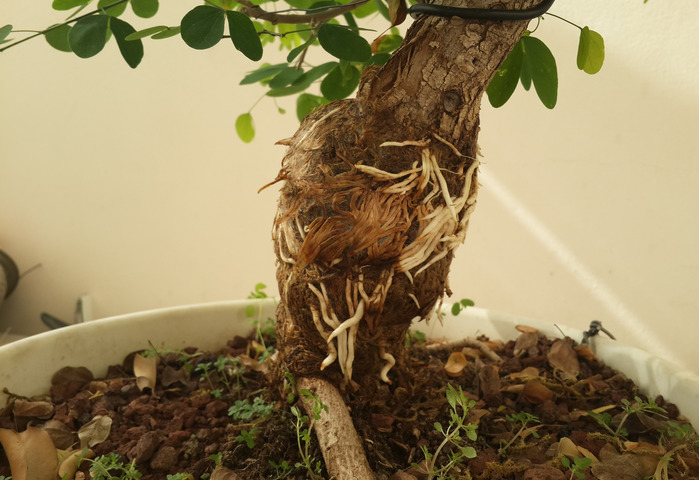
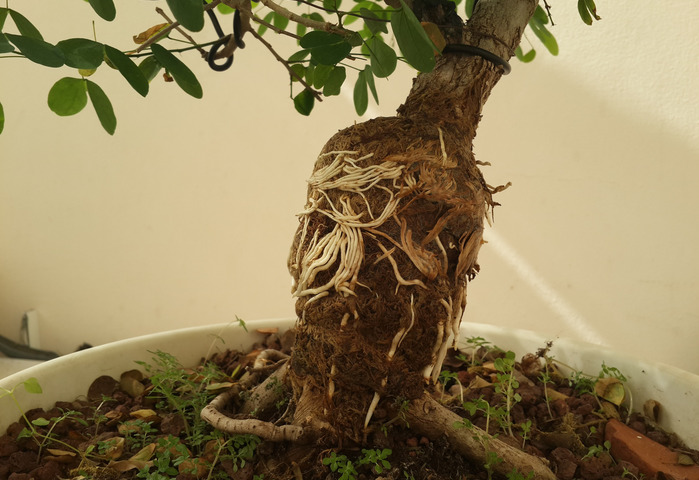
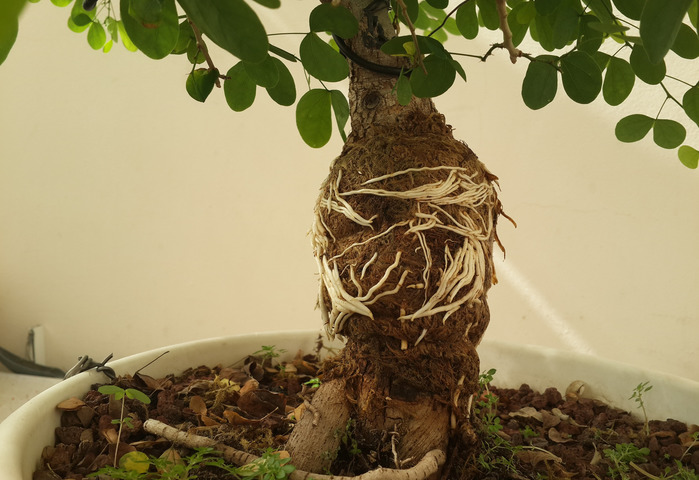
Step 10 / 11
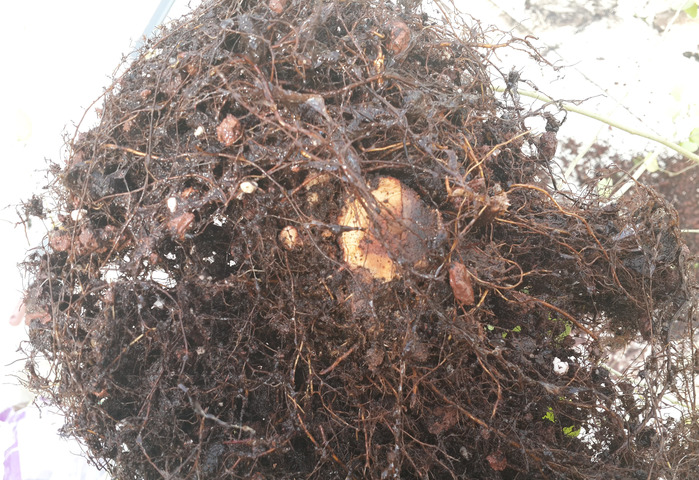
This are pictures from the next spring :)
Remove the training pot
Cut the trunk ( just under the place where the new roots are emerging ) using a good Saw
Notice that the 2nd picture is from bottom up, the upper part of the tree is away from the viewer
Step 11 / 11
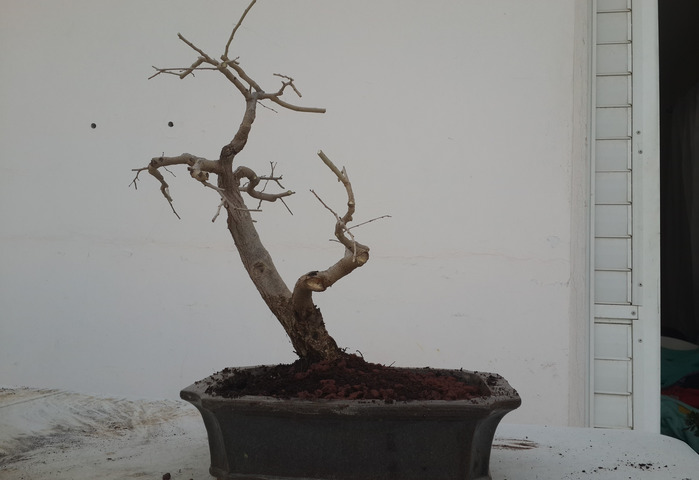
The Final Step ! Plant the new tree in a pot
as you can see, now the proportion are much better, and the nebari is much better with a spread of roots to 360 :)
regarding the bottom part of the tree...it is still living of course...and will now grow new branches :)
Hope this guide was valuable for you !
Thanks for reading :)
We invite you to Join 1000+ artists from 43 countries

it is totally FREE and takes less then 45 sec !
Become a member and enjoy all the benefits
