
Step 1 / 9

14/11/2008
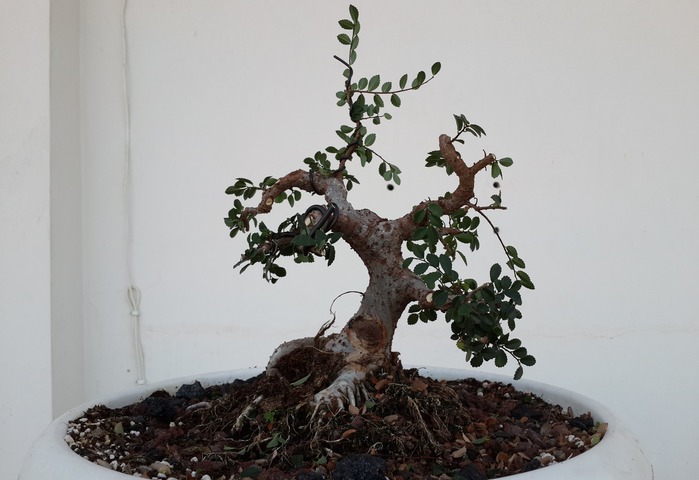
This is how I bought this tree, it was 2 year old, after growing in a big container
Step 2 / 9

2/9/2009
still in the same training pot, growing slowly but healthy and the big scar on the trunk begins to hill
Step 3 / 9

19/3/2010
Step 4 / 9


2011
Here you can see the technique of a sacrifice branch
I let one of the branches get really long and then I cut him back
The goal of the sacrifice branch is to thicken the trunk, and this was the 1st time I tried it on an Ulmus, to my surprise, the branch itself became very thick, but the diameter of the trunk as hardly changed
the sacrifice branch left an ugly scar, but it is an Ulmus so it will hill completely in a year or so
Step 5 / 9


5/3/2012
at the lower part of the trunk you see a scar, created from removing a big sacrifice branch that helped me thickened the trunk and develop the nebari
Step 6 / 9


2013
The tree continue his development during 2013
Step 7 / 9


15/2/2014
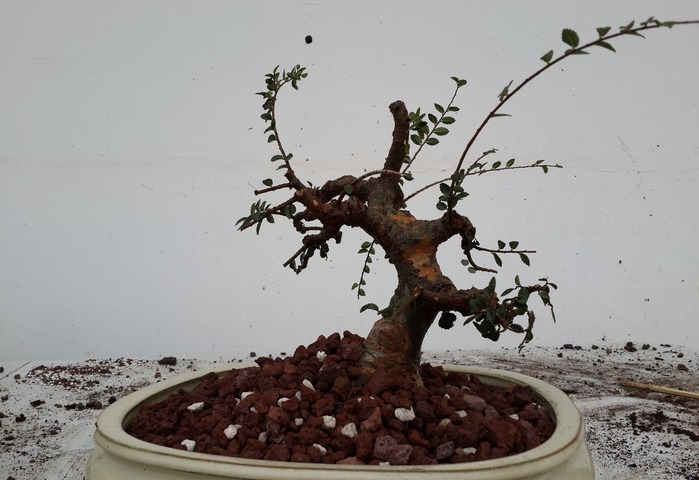
it was time to move the tree to a small bonsai pot, when taking out of the big training pot, I understood I will need to cut almost 90% of the feeding roots, but since it was a good period ( spring ) and it is an Ulmus, I decided to go ahead :
Report process : I used a saw to cut the root ball, then I continue to cut till I reached the initial spreading of the roots from the nebari, in the new pot, I spread on the bottom big chunks of tuff to improve the draining and then a mix of smaller crushed tuff with Pumis, I covered the tree in a transparent nylon bag and positioned it in full shadow
5/8/2014
3rd picture shows that the tree survived and healthy :)
Step 8 / 9


2015
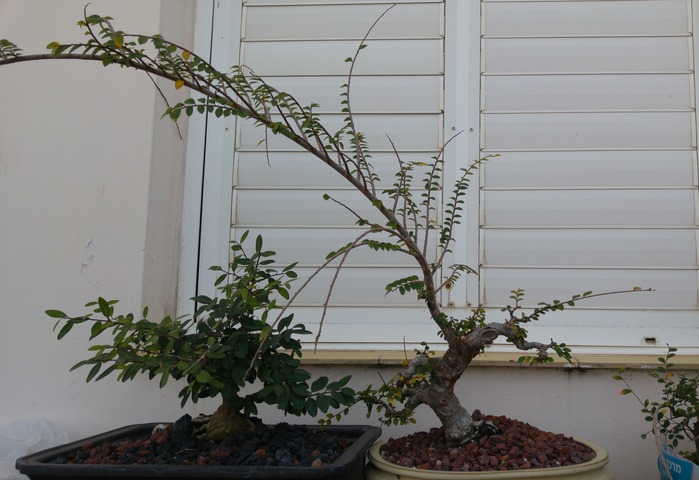
The position of the branch in the top left was not ideal, so i cut it off, and will start new branch instead ( marked by a read arrow )in a better position
it will take up to 1 year, but in Bonsai - patience is important !
So I decided to grow it, in the pictures you can see that I let him grow without disturb so he will thicken quickly
Step 9 / 9


1/2/2016
I let the branch become long so he would be thick
Now that he is thick and in good proportion to the rest of the tree, I cut it to the required length
Now I start with the fine ramification of the top branches
We invite you to Join 1000+ artists from 43 countries

it is totally FREE and takes less then 45 sec !
Become a member and enjoy all the benefits