Step 1 / 9
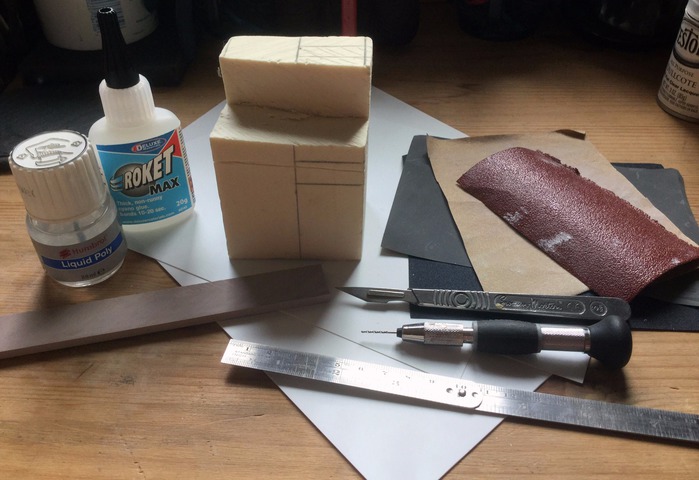
Tools and materials needed for making the barrels.
Step 2 / 9
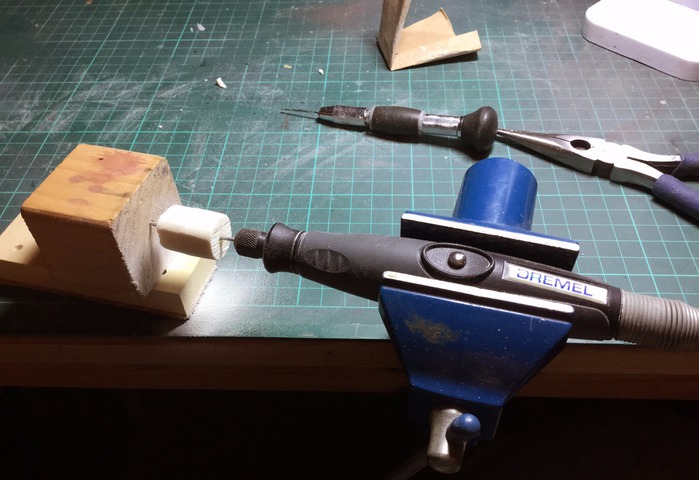
Making the Basic Form
1/3 - The first step is to cut a block of the model board, then drill a hole through the centre and super glued a length of pinning wire through it, making sure we have a good 30mm of wire sticking out each end. Then, by clamping my Dremel extension to my worktable I made a quick and dirty home lathe. I secured the modelboard block into the Dremel and used a piece of wood the other side to stop the modelboard shooting off and hitting me. I suppose it’s prudent to make sure you wear some safety goggles and a mask at this stage and of course, you know I did…honest!
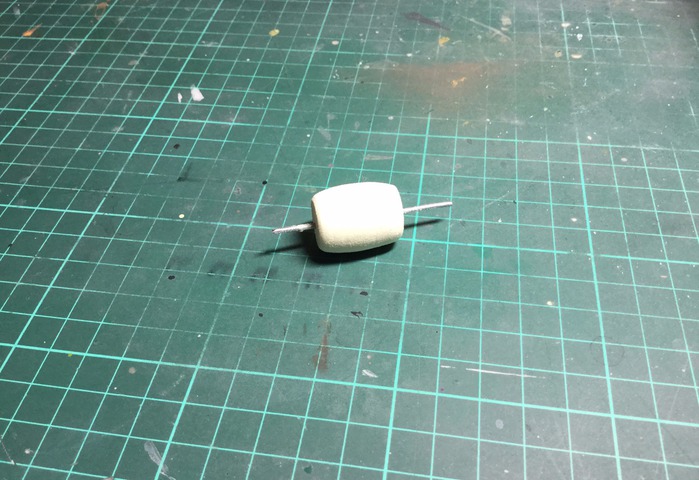
2/3 - After turning the Dremel on I used a piece of sand paper to form the shape of the barrel. This was trial and error, but I will say, take your time doing this, the Dremel is very fast and if you’re not careful it will bite you and ruin the shape of the barrel. I found it easier to do one side of the barrel, then turn it around in the Lathe and then do the second side using the first as a guide. After a few minutes I was happy with the result. Time to clear away all the dust.
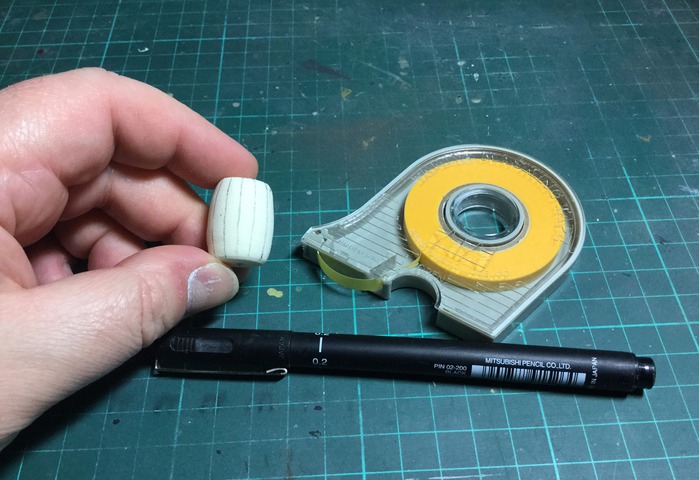
3/3 - I snipped away the extruding wire from the barrel form and then, using some masking tape I began to segment the form so I had a guide for the planks that will later cover the sides. It’s a good idea to use the wire that can be seen at both ends as a start and end point for the tape, then with a felt tipped pen draw a straight line down the side of the tape.
Step 3 / 9
Taking care of the two ends
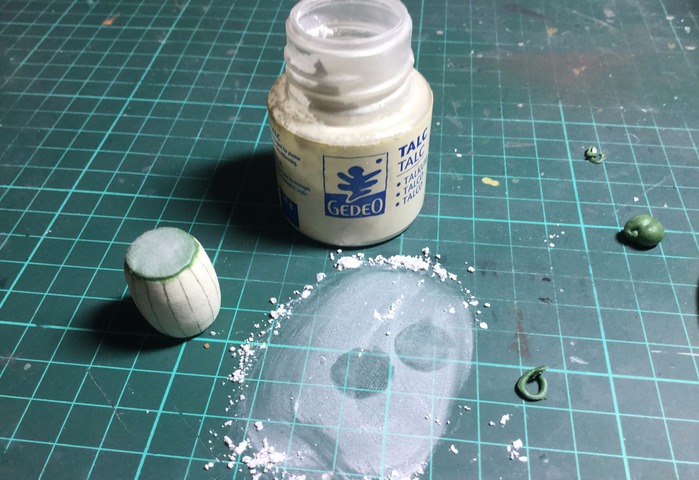
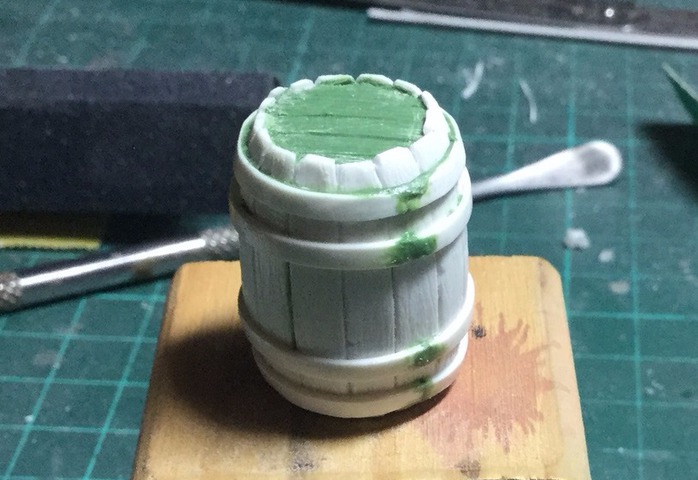
1/2 - Now it’s time to hide that wire at the top and bottom ends of the form. I mixed some greenstuff (other sculpting mediums are available), then, with some talc on the cutting mat to stop it sticking, I pressed it flat; then trimmed the edges to remove the excess putty.
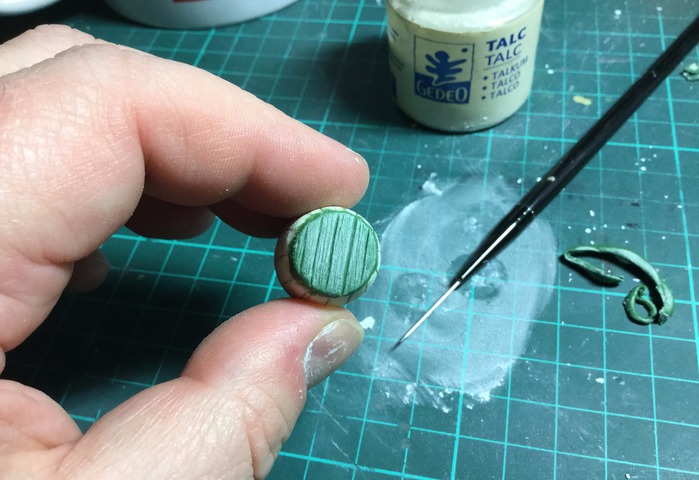
2/2 - Using a sculpting tool I made myself from a sewing needle and an old paintbrush I sculpt in a wooden plank texture into the two ends. I take care how I hold the form as I don’t want to accidently smudge my own work! Once done I put it aside for a few hours to let the putty cure.
Step 4 / 9
Making the Planks
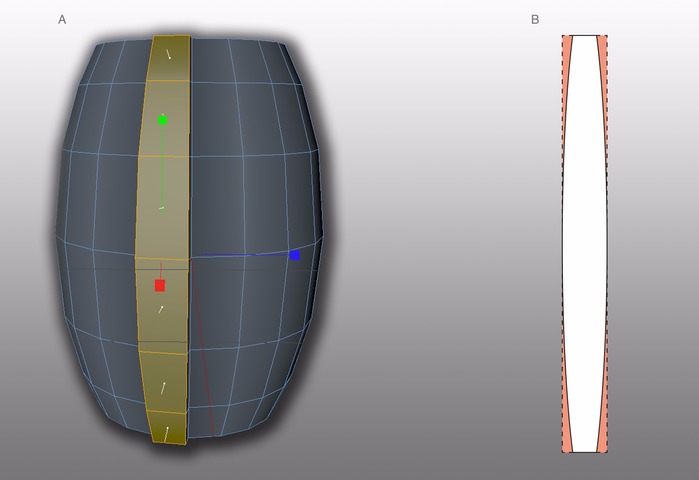
1/3 - As you can see in the illustration above the planks that will lace the side of the barrel cannot be made from straight pieces of plasticard because the middle of the plasticard is wider than the two ends. So using the guides that I drew on the side earlier I measure that the planks have to be 6mm in the middle and 3.5mm at each end.
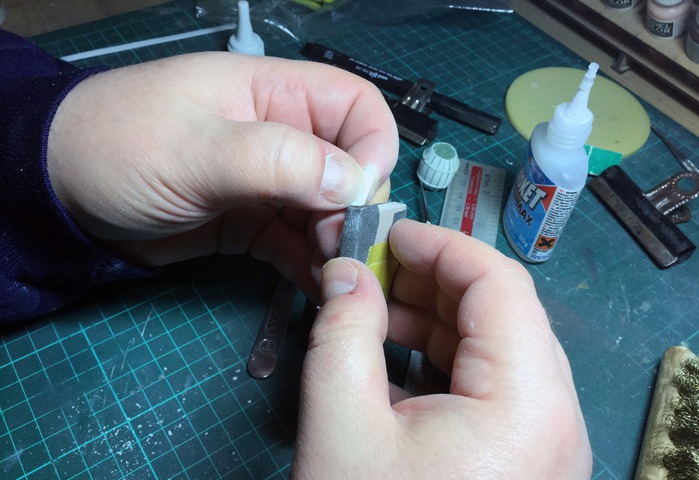
2/3 - After I cut 6mm wide strip of the .5mm thick platicard I cut it into segments and began to shape the ends using sand paper. I also rounded the sides of the facing edge that will form the separation of each plank when painting. Once I had enough I started to super glue them around the edges of the barrel form. I’ll be honest and mention that some needed extra shaping work once they were in place to make the fit nice a tight. Once complete I brushed on some Liquid Poly Cement to seal all the planks together. The piece was then left for a few hours to dry completely.
3/3 - When I next picked up the barrel I wasn’t happy that some of the planks kind of stuck out a bit more than other. This was due the angle they had been glued to the modelboard form. Oh well, easy to fix with some more sanding. This gave it a rounder feel.
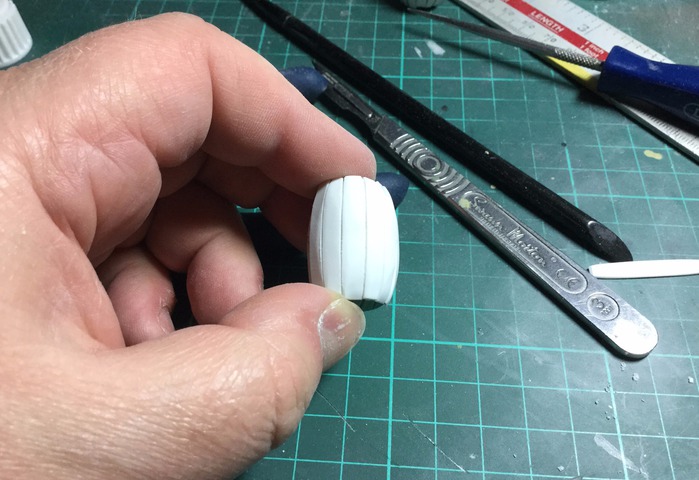
Step 5 / 9
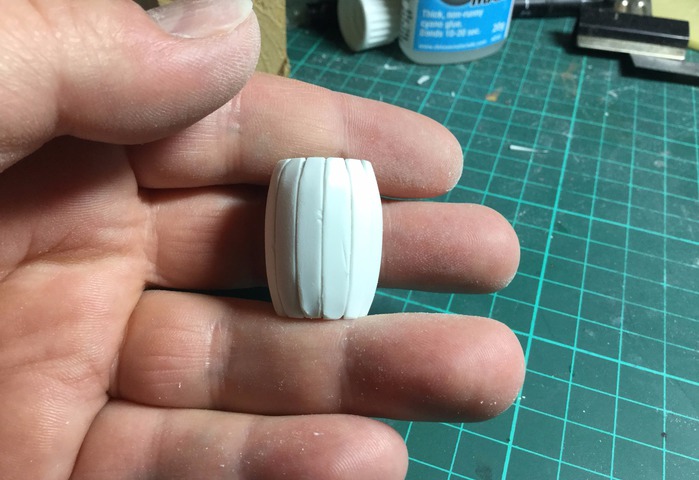
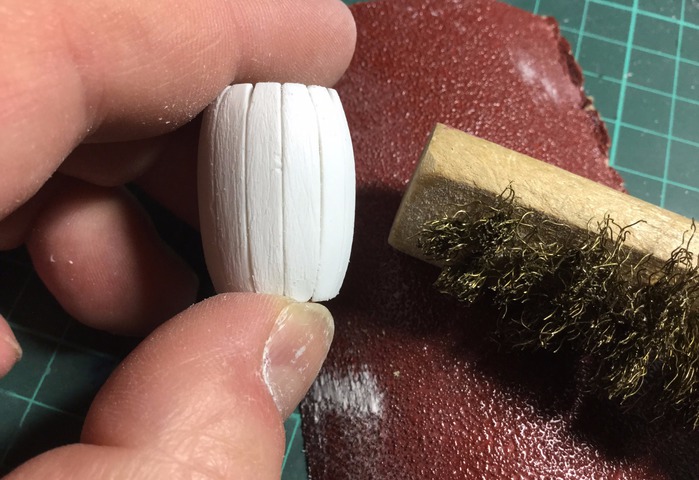
Texturing the planks
1/2 - Now comes the surprisingly easy, but very effective part where the model really starts to look like what it is supposed to. I started by, with my scalpel, cutting some grooves and notches into some of the planks. These will add some character to the model and give me something to enhance when painting.
2/2 - Using some very rough sandpaper (P80) I started to rough the surface up making sure I had all areas covered. This creates a nice wood grain texture, but leaves the surface bitty and not suitable for painting. So I then, using a wire brush start to clean the surface. You don’t have to be too careful at this stage as the scratches the brush makes just adds to the texture. Once done, it was better, but not perfect with stringy bits of plastic that will ruin anyone’s paintjob, so again I turned to the Liquid Poly Cement and brushed it all over the surface of the plasticard planks, then put it aside to dry over night.
Step 6 / 9
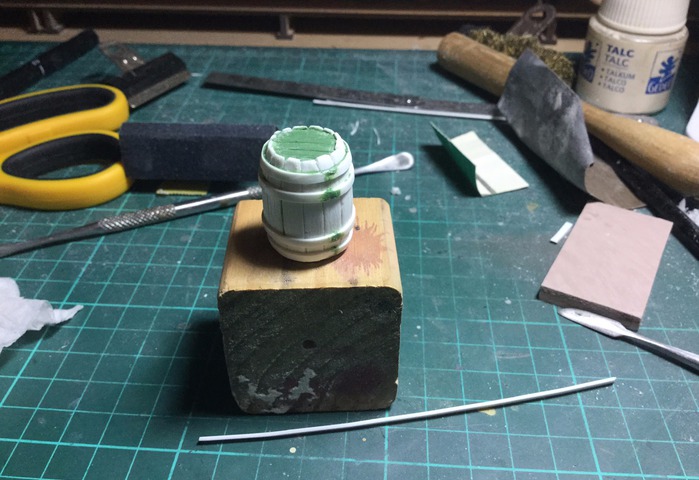
Adding the metal bands around the barrel
The final step was to add the metal bands around the barrel. This was made with very thin (3mm) strips of the .25mm thick plasticard. I started by supergluing it to one plank the pulling it to the next, adding a spot of glue and pressing it into place. Then repeat until it goes all the way around the barrel. I cut it a couple of millimetres short then used a small blob of greenstuff to fill the gap.
Step 7 / 9

The final stage
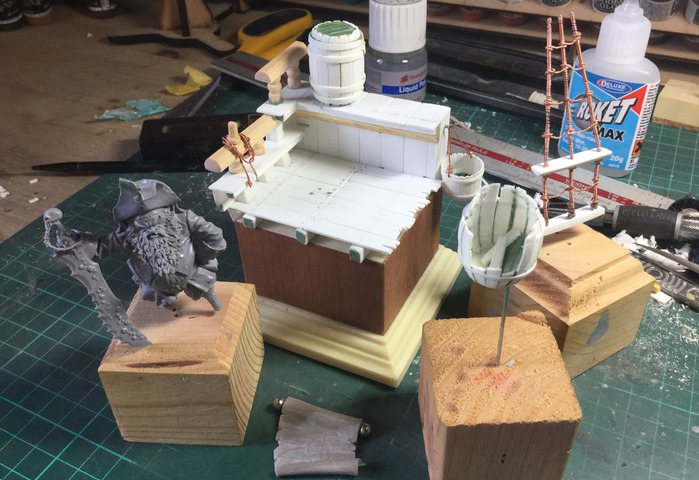
Here you can see the completed barrel with all of the other parts and components to the base I made. Some unfortunately didn’t get used for reasons mentioned at the start of this article. I always wanted a stack of three barrels in my scene. No I had the choice of making two more but since there was a lot of trial and error in this process I knew I’d end up with three very different looking barrels, which wouldn’t do.
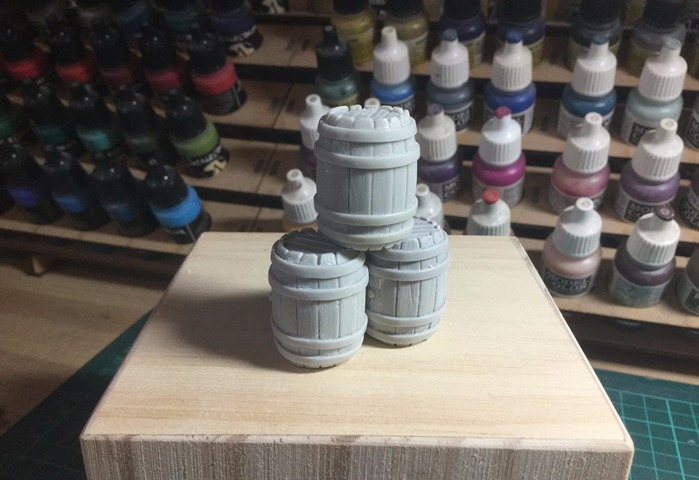
Because this master was going to be cast I had to make sure that all the overhangs and holes where filled or silicon rubber will seep into those spots and tear the mould when the master is removed and also cause the surface of the cast to break away from the bulk. This is called de-lamination. Once it was ready I sent it off to my best friend Martyn Dorey who owns Model Display Products and is a superb resin caster. A week or so later I received a nice little package in the post containing several barrels ready for paint :)
Step 8 / 9
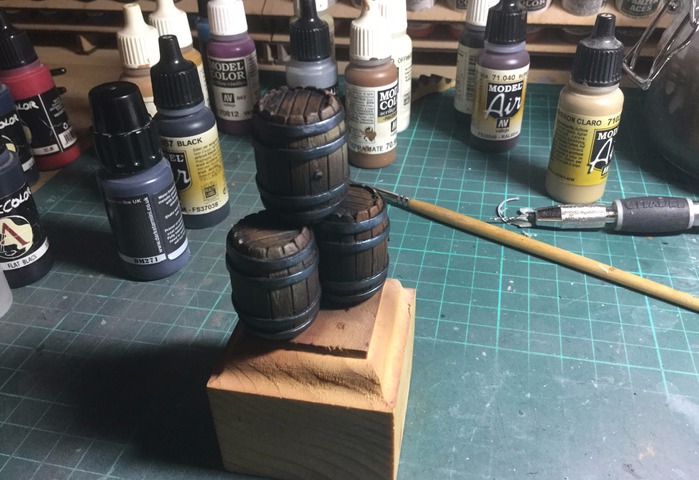
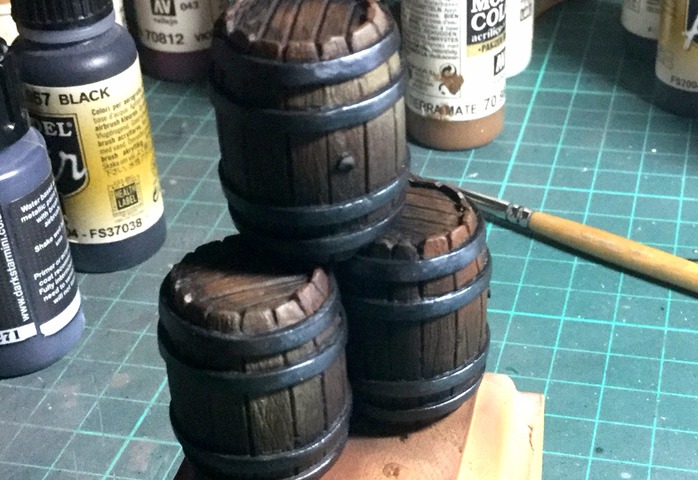
Painting the barrels ( 2 hours )
The first step after they barrels were primed grey was to give them a nice smooth coat of mid brown. This was airbrushed on over several layers building up an opaque coat that concealed all of the primer. Once this was done I masked off the top barrel and adding some black to my mid brown I sprayed the lower parts. After removing the mask I covered the top barrel to protect it and with the same darker mix, airbrushed shades between the lower two and again, around their bases.
Next using a slightly golden brown I airbrushed a kind of over shape on the upper front of each of the barrels. Them using a very light brown and shooting from below I airbrushed the top of the planks that were in the golden oval.
Finally and this was just to key the barrel’s in with my base I dusted some dark blue into the deeper shadows areas of the back of the two lower barrels and some dark magenta into the deeper shadow area’s of the front of the barrel’s.
The next stage was to undercoat the bands in black this would help keep the tone of the quite dark. Again this was done over several thin coats to build up the opaqueness, while keeping all the details.
Once the bands were dry I mixed a wash of dark brown and applied this to the whole of the barrel’s. In fact several coats of this were applied to build up the detail of the wood texture. Make sure to let each coat dry properly beading the next or you’ll bring up paint from the lower layers and cause lumps of semi-dried paint. To speed up drying time I use a hairdryer.
Next comes a wash of black, again put all over the barrels, this emphasises the texture a bit more. Once dry I mix another black, very thin, but not a wash, this was painted in between each of the planks and where needed — blended out to a smooth transition.
The final stage is to paint the metal bands. A dark steel metal was used as a base coat, as always applied in several thin layers, and then in that golden oval area, a lighter colored metal was painted in and blended out to soften the edges.
Step 9 / 9
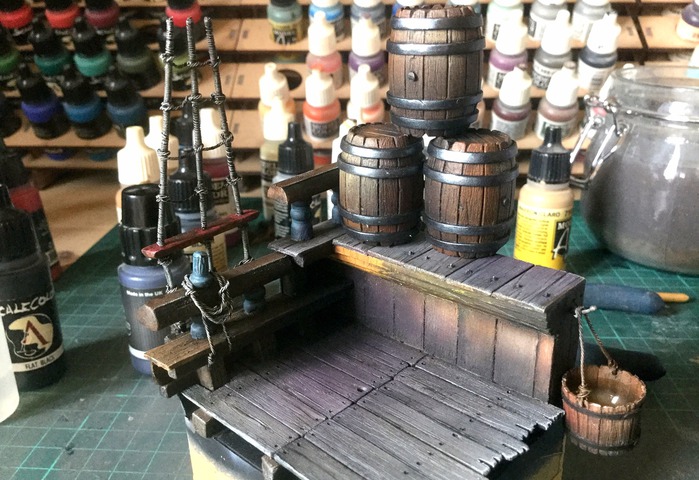
In the final picture you can see the barrels, along with the rest of the scenic display base fully painted.
The barrels will soon be available to buy from www.modeldisplayproducts.co.uk and if time allows I will do a more in-depth tutorial into the making of the whole display base and publish it in Figure Painter Magazine (www.figurepaintermagazine.co.uk).
I hope you find this guide useful and with a certain Kickstarter about to hit the streets where barrels could be very useful I hope you give making them yourself a go
We invite you to Join 1000+ artists from 43 countries

it is totally FREE and takes less then 45 sec !
Become a member and enjoy all the benefits
