Step 1 / 12
Cut the Balsa Foam to the required blind size.
The overall size of the generator (to 1/35 scale) would be 42mm long x 33mm wide x 37mm high).
Step 2 / 12
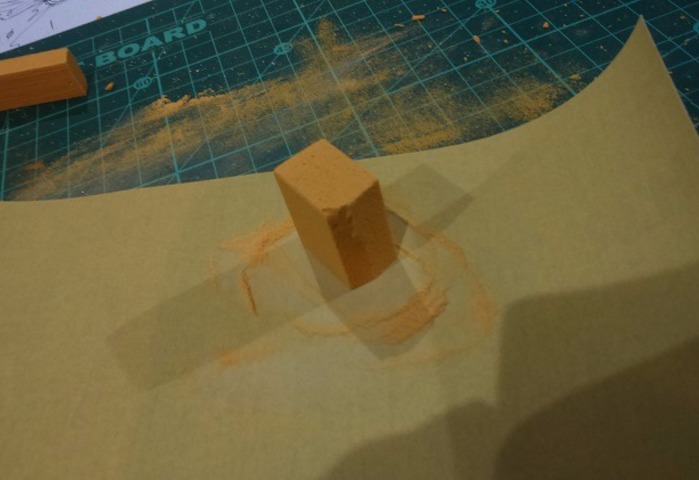
Square them up on a piece of #500 grit sandpaper.
It is important to use a combination of circular and diagonal motions when squaring up a a block - be it Balsa Foam or steel
Step 3 / 12
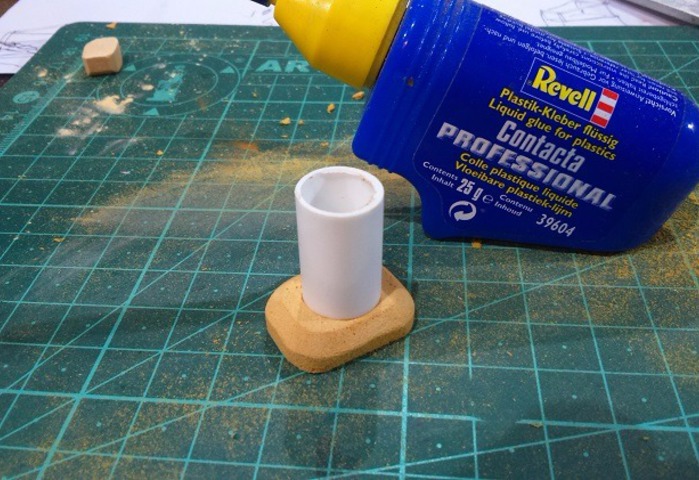
Cut a 20mm long tube from the 12.5mm dia styrene tube.
Glue the tube onto the shaped cowling made from Balsa Foam. I used plastic glue here for the styrene, but super glue works equally as well.
Use super glue to stick Balsa Foam to Balsa Foam for a sandable quick bonding.
Step 4 / 12
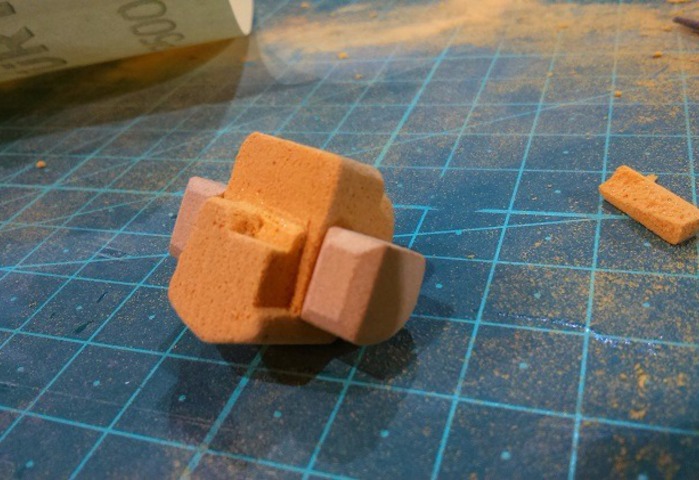
Shape the two cylinder housings out of #20 Balsa Foam - it is harder, so it retains those bevelled edges.
I shaped the main engine block / housing out of #10 Balsa Foam, as it is quicker to work with and I wanted to create a certain rusted effect on the finished model.
#5 Balsa Foam is the softest, and it will not keep it's shape during a lot of handling during the construction time.
Glue the three pieces together using super glue.
Step 5 / 12

My spares box offered this fuel tank from a Dragon flame thrower pump. As this is very much a freebuild, even a cylindrical petrol tank would do.
Drill 2mm dia holes for the manifolds.
Step 6 / 12
Cut short lengths of 2mm dia styrene rod, bend to shape in either hot water, or carefully in front of a hobby blow torch.
Find sensible and suitable attachments for the generator in your spares box, or make up some with styrene.
Step 7 / 12
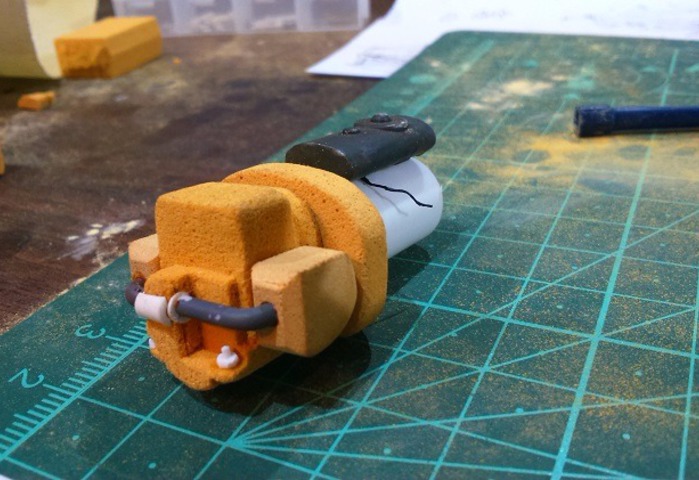
Glue on extra details made up from styrene and / or use detail from your spares box.
If you want to end up with a perfectly smooth surface, first fill / seal it and sand it smooth before adding details.
Step 8 / 12
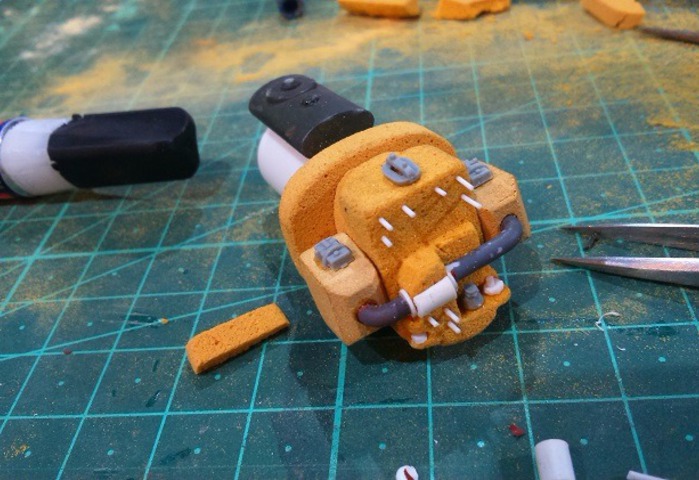
Cut the engine block's "threaded rods" from 0.5mm styrene rods.
Drill 0.5mm holes for the rods (Balsa Foam drills very quickly).
Glue the rods into position.
Once dry, snip them off close to the block.
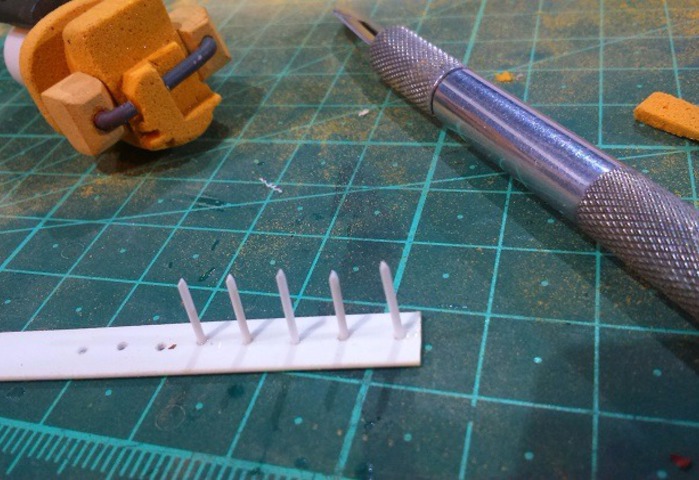
Step 9 / 12
Add more details and do the first coat of filler / seal on the areas you want to have smooth.
A dress-maker's pattern copying wheel is a good way to create rivets on 0.25mm styrene.
First do the strips with the rivets before glueing them onto the generator.
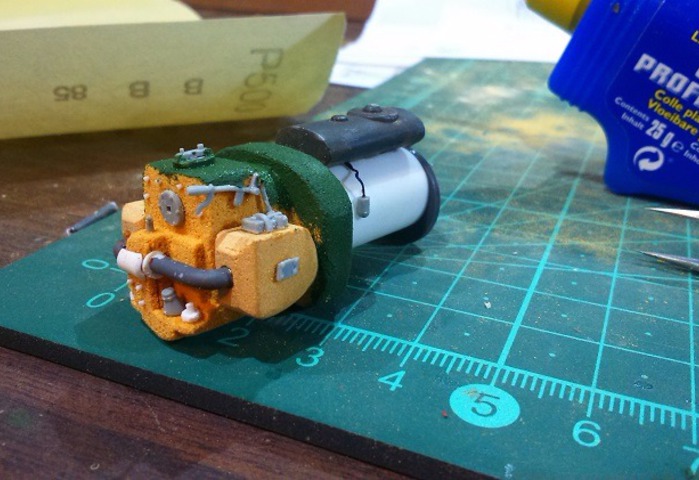
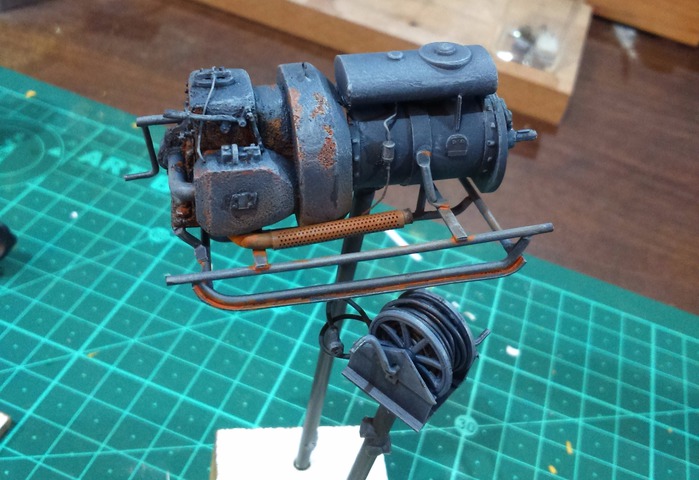
Step 10 / 12
Once the filler is dry, sand it smooth according to the Balsa Foam you shaped.
I used bent 1.5mm dia copper tube for the exhausts and found a spare Dragon kit exhaust grill which I cut into two for the two exhausts I needed.
Make up the sled from 1.5mm styrene rod, and 0.5mm x 2.5mm styrene strips.
Use the 0.25mm x 2.5mm styrene strips to add detail to the generator.
Step 11 / 12
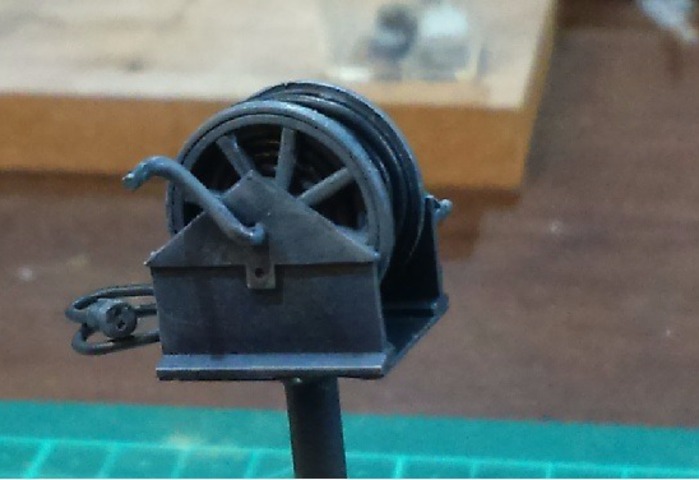
I made up an accompanying cable roller out of the spares box and scraps of styrene.
0.8mm solder makes a wonderfully easy to bend 1/35 mains electrical cable!
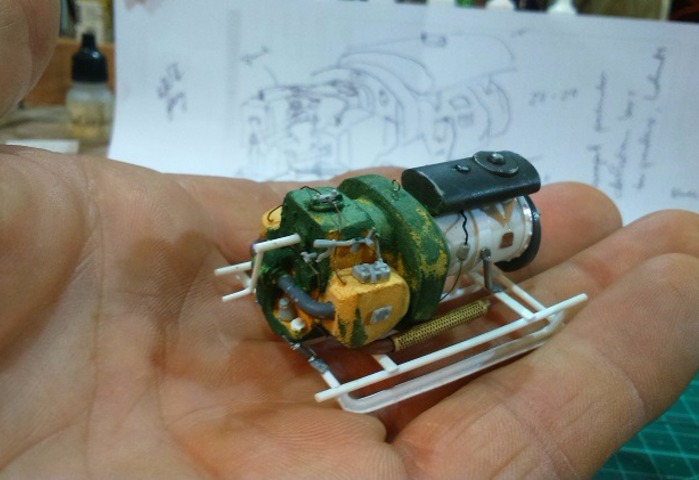
Step 12 / 12
Paint the generator the colour required by the diorama. Mine was for early WWII, so I stuck with field grey.
We invite you to Join 1000+ artists from 43 countries

it is totally FREE and takes less then 45 sec !
Become a member and enjoy all the benefits
