How to attach branches
Adding a dry branch to our design also achieve a noticeable change.
In nature we see healthy trees that have death branches, this are the traces of time, in some moment of it´s life suffered some accident, also we can see that it recovered quickly and other branches came out instead of that, the combination between the green of the new branches and the colours: white, black and reddish (depends of the species) of death branches, create an espectacular combination, if we imitate this behavior, we can add our bonsái a special touch.
I am going to show you how unite these death branches to the tree trunk to remain firm and no note and so provide to our material the element that was missing.
In this example the plant that I use it´s a good material, could be achieve a good result without attach branches, but what I wanted to show is just that this tipe of material, of this quality can also improve.
1- The most important it´s to get a death branch of the same species (or if it is of the same species that the woods are the same colour) and that these movements are in line to the trunk and the desired desing.
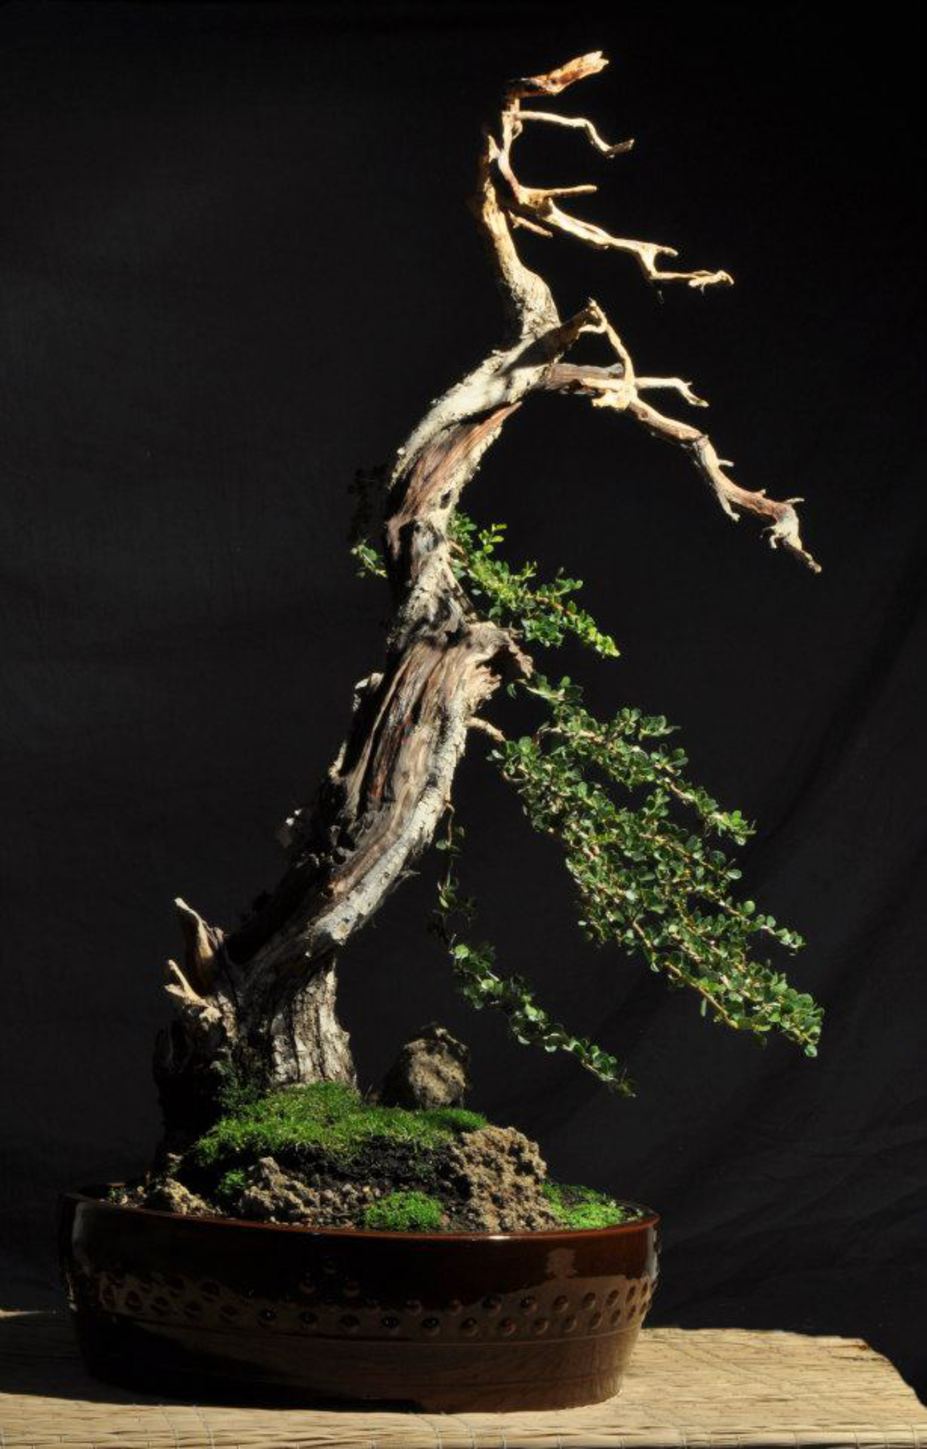
In this case I will work in a Moradillo (Schinus fasciculatus) (Picture Nº 1)
This exemplar has movement, cortex, natural death wood, for my taste missing something that deep, thats why I decided to add a death branch, it is needed to break with the uniform structure, this way It will be elegant and stylized, and in the future green masses will be combined with these branches, certainly have a good result. (picture 2,3,4,5,6,7)
2- The diameter of the branches to unite must be the same size as the stump of the trunk.
3- A hole made by machine with a diameter wick that is half or less than the diameter of the branches, the two branches are bored 2 cm deep (it depends the size of the branch that attaches) (picture nº 10,11,12,13)
4- At the end of the holes have to do a special job with a carving tool as the drawing ( draw and picture nº 14,15) this way when filling with epoxy resin, the creation of an inward and invisible bridge between the two parties (pictures nº 16,17)
5- A good way to keep together the two parts to be bonded and to prevent the resin drop us is by using plastic tape, place it tigh. (picture nº 18)
6- After the two sides will work, now with this new structure of the trunk we will desing the rest of the tree.
7- Also with this example I want to share another way to protect a give colour to the wood, this species has the red wood and white parts, flaxs oil protects the wood from moisture and highlights the colours, it´s a natural product, colour schemes can achieve in this case the light-colored bark and reddish wood with some lighter colours in death branches (NOT to put the oil on the LIVING PARTS) It is another option besides the already known white polisulfuro give us. Theres also products to protect the wood from insects and UV rays also enhance the grain and wood colours are called impregnating, these are chemicals, they can also be used.
Using computer programs for example photoshop we can desing a tree, location of branches, planted tilt, is agood tool that help us decide on final desing and carry out (example design by fotoshop)
Note : this technique can be applied with thick trunks, but in this case is not more than reinforce the work that the resin with screws.